How to Establish a Basic Skincare Routine
Taking care of your skin is essential for maintaining its health and radiance. Establishing a basic skincare routine is the foundation of good skincare habits, helping to keep your skin clean, hydrated, and protected from environmental stressors. Whether you’re new to skincare or looking to refine your regimen, this guide will walk you through the steps to create a simple yet effective skincare routine tailored to your skin’s needs.

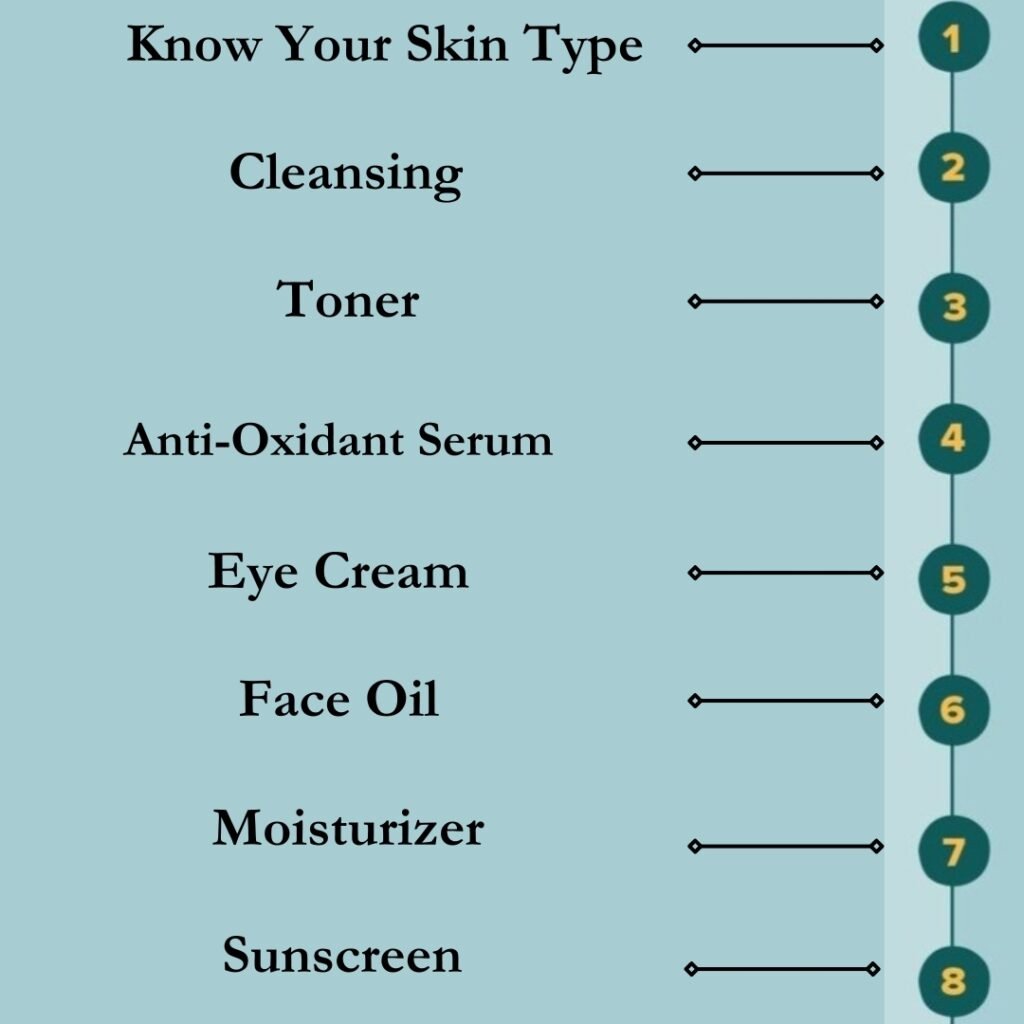
Step 1. know your skin type
Before diving into a skincare routine, it’s crucial to understand your skin type. Common skin types include normal, oily, dry, combination, and sensitive. Knowing your skin type will help you choose the right products that address your specific concerns without causing irritation.
types of skin are as follows:
Normal Skin: Normal skin typically has balanced moisture levels, few imperfections, and small pores.
Oily Skin: oily skin tends to produce excess sebum, leading to a shiny or greasy appearance, enlarged pores, and a propensity for acne and blackheads.
Dry Skin:Dry skin lacks sufficient moisture, resulting in a tight or rough feeling, flakiness, redness, and sometimes itchiness or sensitivity.
Combination Skin: Combination skin exhibits traits of both oily and dry skin types, with an oily T-zone (forehead, nose, and chin) and drier cheeks.
Sensitive Skin: Sensitive skin is prone to reactions such as redness, itching, burning, or stinging when exposed to certain products or environmental factors.
how to identify your skin type

- Cleanse Your Face: Wash your face with a gentle cleanser and pat it dry with a clean towel. Avoid using any skincare products immediately before the test.
- After 30 Minutes: Notice how your skin feels. Does it feel tight or uncomfortable? Is it oily, shiny, or greasy?
- Throughout the Day: Pay attention to how your skin behaves. Does it become oilier as the day progresses? Does it feel dry or irritated in certain areas?
- Check Your T-zone:Focus on your forehead, nose, and chin (the T-zone). Is this area oilier than the rest of your face? Are your pores more noticeable in this area?
Normal skin Will feel neither too oily nor too dry. It will have a smooth texture, with minimal blemishes and a radiant complexion.
Oily skin may feel slick or greasy to the touch, especially in the T-zone (forehead, nose, and chin). It often appears shiny, particularly in hot or humid conditions.
Dry skin will feel tight and may appear dull or flaky, especially after cleansing. It may also be prone to redness or irritation, particularly in extreme weather conditions.
Combination skin will have an oily or shiny appearance in the T-zone, while other areas, such as the cheeks, it will feel normal or dry. Pores may be enlarged in the oily areas.
Sensitive skin reacts easily to skincare products, cosmetics, or environmental triggers like sunlight or harsh weather. It may feel tight, itchy, or uncomfortable after using certain products.
Step 2.cleansing

Cleansing is a fundamental step in any skincare routine, but the method you use should be tailored to your specific skin type to ensure optimal results and minimize potential irritation. Here’s how to cleanse your face according to different skin types:
1. Normal Skin and combination Skin:
Cleanser: Use a gentle, pH-balanced cleanser that effectively removes dirt and impurities without stripping away natural oils.
Method:
1. Wet your face with lukewarm water.
2. Apply a small amount of cleanser to your fingertips and gently massage it onto your skin using circular motions.
3. Rinse thoroughly with lukewarm water and pat your skin dry with a clean towel.
4. Follow up with a moisturizer to keep your skin hydrated.
2. Oily Skin:
Cleanser: Opt for a foaming or gel-based cleanser with ingredients like salicylic acid or benzoyl peroxide to help control excess oil and prevent breakouts.Cleaners that include ingredients like aloe vera and tea tree oil will also prove effective.
Method:
1. Wet your face with lukewarm water.
2. Dispense a small amount of cleanser onto your fingertips and lather it up by rubbing your hands together.
3. Gently massage the cleanser onto your skin, focusing on oily areas and areas prone to breakouts.
4. Rinse thoroughly with lukewarm water and pat your skin dry with a clean towel.
5. Avoid over-cleansing, as it can strip away too much oil and lead to rebound oil production.
3. Dry Skin:
Cleanser: Choose a hydrating, creamy cleanser that replenishes moisture and soothes dry, sensitive skin. consider looking for ingredients such as petrolatum,and mineral oil. Seek out a cleanser with a non-foaming formula that is hypoallergenic, devoid of fragrance, chemicals, or alcohol.
Method:
1. Wet your face with lukewarm water.
2. Apply a pea-sized amount of cleanser to your fingertips and gently massage it onto your skin using upward circular motions.
3. Rinse thoroughly with lukewarm water and pat your skin dry with a clean towel.
4. Follow up with a moisturizer or facial oil to lock in moisture and prevent dryness.
4. Sensitive Skin:
Cleanser:Look for a fragrance-free, hypoallergenic cleanser formulated for sensitive skin, with gentle ingredients like colloidal oatmeal or aloe vera.
Method:
1. Wet your face with lukewarm water.
2. Gently massage a small amount of cleanser onto your skin using light, circular motions.
3. Rinse thoroughly with lukewarm water and pat your skin dry with a soft towel.
4. Avoid scrubbing or using hot water, as these can further irritate sensitive skin.
Additional Tips:
– Use lukewarm water for cleansing, as hot water can strip away natural oils and exacerbate dryness or sensitivity.
– Avoid harsh scrubbing or abrasive cleansing tools, as these can irritate the skin and cause micro-tears.
– Follow up with toner, serums, and moisturizer appropriate for your skin type to complete your skincare routine.
By tailoring your cleansing method to your specific skin type, you can effectively remove dirt, oil, and impurities while maintaining the balance and health of your skin. If you’re unsure about which products or methods are best for your skin, consider consulting a dermatologist for personalized advice.
step 3 toner
Using toner in your skincare routine can help balance the skin’s pH levels, remove any remaining impurities after cleansing, and prepare the skin to better absorb subsequent skincare products. Here’s how to use toner for different skin types:
1. Normal Skin:
Toner Use:
– Apply toner to a cotton pad or ball.
– Gently sweep the toner across your face and neck, focusing on areas that tend to be oilier or have larger pores.
– Allow the toner to fully absorb into the skin before proceeding with the rest of your skincare routine.
2. Oily Skin:
Toner Use:
– Look for toners with ingredients like tea tree oil, alpha-hydroxy acids (AHAs), or beta-hydroxy acids (BHAs), with low salicylic acid concentrations to help control excess oil and minimize the appearance of pores.
– Apply toner to a cotton pad or ball and swipe it across your face, paying extra attention to oily areas like the T-zone.
– Avoid overusing toner, as it can strip away too much oil and lead to rebound oil production.
3. Dry Skin:
Toner Use:
– Choose hydrating toners with ingredients like hyaluronic acid or glycerin to replenish moisture and soothe dry skin.
– Apply toner by gently pressing it into your skin with clean hands or using a soft cotton pad.
– Focus on areas prone to dryness, such as cheeks and jawline, and avoid rubbing or tugging on the skin.
4. Combination Skin:
Toner Use:
– Use a balancing toner with a combination of hydrating and astringent ingredients to address the needs of both oily and dry areas.
– Apply toner to a cotton pad or ball and sweep it across your face, adjusting the amount used based on the specific needs of different areas.
– Avoid applying toner to dry patches, as it may exacerbate dryness.
5. Sensitive Skin:
Toner Use:
– Choose alcohol-free and fragrance-free toners formulated for sensitive skin to minimize the risk of irritation.
– Apply toner by gently pressing it into the skin with clean hands or using a soft cotton pad.
– Perform a patch test before using a new toner to ensure it doesn’t cause any adverse reactions.
Additional Tips:
– Use toner after cleansing and before applying serums or moisturizers to maximize its benefits.
– Avoid toners containing alcohol or other harsh ingredients, as they can strip away moisture and irritate the skin.
– Incorporate toner into your skincare routine once or twice daily, depending on your skin’s needs and tolerance.
By selecting the right toner for your skin type and incorporating it into your daily skincare routine, you can help maintain balanced, healthy-looking skin. If you’re unsure about which toner is best for your skin, consider consulting a dermatologist for personalized recommendations.
step 4. Antioxidant serum

Antioxidant serums are potent skincare products that help protect the skin from environmental damage, reduce the signs of aging, and promote overall skin health. Here’s how to use antioxidant serums for different skin types:
1. Normal Skin:
Antioxidant Serum Use:
– Apply antioxidant serum to clean, dry skin after cleansing and toning.
– Dispense a pea-sized amount of serum onto your fingertips.
– Gently massage the serum onto your face and neck using upward, circular motions until fully absorbed.
– Follow up with a moisturizer and sunscreen in the morning, or a moisturizer and night cream in the evening.
2. Oily Skin:
Antioxidant Serum Use:
– Choose lightweight, non-comedogenic antioxidant serums that won’t clog pores or feel heavy on the skin.
– Apply a small amount of serum to clean, dry skin after cleansing and toning.
– Pat the serum onto your face and neck, focusing on areas prone to excess oil production.
– Allow the serum to absorb fully before applying additional skincare products or makeup.
3. Dry Skin:
Antioxidant Serum Use:
– Look for antioxidant serums with hydrating ingredients like hyaluronic acid or vitamin E to replenish moisture in dry skin.
– Apply serum to clean, slightly damp skin after cleansing and toning to help lock in moisture.
– Gently press the serum onto your face and neck using your fingertips, avoiding rubbing or tugging on the skin.
– Follow up with a rich moisturizer or facial oil to further hydrate and nourish the skin.
4. Combination Skin:
Antioxidant Serum Use:
– Choose antioxidant serums that address the specific needs of both oily and dry areas of combination skin.
– Apply a small amount of serum to clean, dry skin after cleansing and toning.
– Use less serum on oily areas and more serum on dry areas to balance hydration levels.
– Allow the serum to fully absorb before applying additional skincare products, focusing on oil-free moisturizers for oily areas and richer moisturizers for dry areas.
5. Sensitive Skin:
Antioxidant Serum Use:
– Select antioxidant serums formulated for sensitive skin, free from fragrances and harsh ingredients that may cause irritation.
– Perform a patch test before using a new serum to ensure it doesn’t cause any adverse reactions.
– Apply a small amount of serum to clean, dry skin after cleansing and toning, and observe how your skin reacts.
– If tolerated well, continue using the serum as part of your skincare routine, adjusting the frequency of use as needed to prevent irritation.
Additional Tips:
– Incorporate antioxidant serum into your skincare routine once or twice daily, depending on your skin’s needs and tolerance.
– Follow up with sunscreen during the day to further protect your skin from UV damage and enhance the effectiveness of antioxidants.
– Be patient and consistent with your skincare routine, as it may take time to see noticeable results from antioxidant serums.
By incorporating antioxidant serums into your skincare routine and tailoring their use to your specific skin type, you can help protect and nourish your skin for a healthier, more radiant complexion. If you’re unsure about which antioxidant serum is best for your skin, consider consulting a dermatologist for personalized recommendations.
step 5. eyecream

Using eye cream is an important step in skincare for maintaining the delicate skin around the eyes, targeting concerns like dark circles, puffiness, fine lines, and wrinkles. Here’s how to use eye cream for different skin types:
1. Normal Skin:
Eye Cream Use:
– After cleansing and applying toner, dispense a small amount of eye cream onto your ring finger.
– Gently dab the eye cream around the orbital bone, starting from the inner corner of the eye and moving outward.
– Use a gentle tapping motion to pat the eye cream into the skin until fully absorbed.
– Apply eye cream twice daily, in the morning and evening, as part of your skincare routine.
2. Oily Skin:
Eye Cream Use:
– Choose lightweight, gel-based eye creams that won’t feel heavy or greasy on the skin.
– Use a small amount of eye cream and apply it sparingly around the orbital bone, avoiding the eyelids.
– Gently tap the eye cream into the skin until fully absorbed, focusing on areas prone to puffiness or fine lines.
– Apply eye cream twice daily, adjusting the amount used based on how your skin responds.
3. Dry Skin:
Eye Cream Use:
– Look for rich, hydrating eye creams with ingredients like hyaluronic acid or ceramides to replenish moisture in dry skin.
– Apply a pea-sized amount of eye cream around the orbital bone, including the under-eye area and outer corners of the eyes.
– Use your ring finger to gently pat the eye cream into the skin until fully absorbed, avoiding pulling or tugging on the delicate skin.
– Apply eye cream twice daily, paying extra attention to dry or dehydrated areas around the eyes.
4. Combination Skin:
Eye Cream Use:
– Choose eye creams that address the specific concerns of both oily and dry areas of combination skin.
– Apply a small amount of eye cream around the orbital bone, adjusting the quantity based on the needs of different areas.
– Gently tap the eye cream into the skin until fully absorbed, focusing on hydrating dry areas and avoiding excess application in oily areas.
– Apply eye cream twice daily, morning and evening, to maintain hydration and target specific concerns.
5. Sensitive Skin:
Eye Cream Use:
– Select fragrance-free and hypoallergenic eye creams formulated for sensitive skin to minimize the risk of irritation.
– Perform a patch test before using a new eye cream to ensure it doesn’t cause any adverse reactions.
– Apply a small amount of eye cream around the orbital bone, using gentle tapping motions to avoid aggravating sensitive skin.
– Apply eye cream twice daily, monitoring how your skin responds and adjusting the frequency or amount used as needed.
Additional Tips:
– Be gentle when applying eye cream, as the skin around the eyes is delicate and prone to damage.
– Avoid applying eye cream too close to the lash line or getting it into the eyes.
– Consistency is key: Use eye cream regularly to see the best results and maintain the health and appearance of the skin around the eyes.
By incorporating eye cream into your skincare routine and tailoring its use to your specific skin type, you can effectively address concerns and maintain the delicate skin around the eyes for a youthful, radiant appearance. If you’re unsure about which eye cream is best for your skin, consider consulting a dermatologist for personalized recommendations.
step 6. light face oil

Using a lighter face oil can provide hydration, nourishment, and protection for all skin types without feeling heavy or greasy. Here’s how to use a lighter face oil for all skin types:
1. Choose the Right Oil:
– Opt for lighter oils such as jojoba oil, grapeseed oil, argan oil, or rosehip seed oil, which are less likely to clog pores and feel heavy on the skin.
– Avoid heavier oils like coconut oil or avocado oil, which may be better suited for very dry or mature skin.
2. Cleanse and Tone:
– Start by cleansing your face with a gentle cleanser suitable for your skin type.
– Follow up with a toner ,anti-oxidant serum and eyecream to balance the skin’s pH levels and prepare it for optimal absorption of the face oil.
3. Apply the Face Oil:
– Dispense a few drops of the lighter face oil onto your fingertips.
– Gently massage the oil onto your face and neck using upward, circular motions.
– Focus on areas that tend to be drier or more prone to dehydration, such as the cheeks, forehead, and jawline.
– Avoid applying too much oil, as a little goes a long way. Start with a small amount and add more if needed.
4. Customize for Your Skin Type:
– For Normal Skin: Apply the face oil as the final step in your skincare routine, both morning and evening, to lock in moisture and provide a protective barrier for the skin.
– For Oily or Combination Skin: Use the face oil sparingly, applying it only to areas that feel dry or dehydrated. You can also mix a drop or two of the oil into your moisturizer for added hydration without feeling heavy.
– For Dry or Sensitive Skin: Apply a slightly larger amount of face oil to provide extra nourishment and protection for the skin. You can also use the oil as a spot treatment on dry patches or areas of irritation.
Additional Tips:
– Experiment with different oils to find the one that works best for your skin type and addresses your specific concerns.
– Incorporate the lighter face oil into your skincare routine gradually to monitor how your skin responds and adjust as needed.
– Listen to your skin: If you notice any irritation or adverse reactions, discontinue use of the face oil and consult a dermatologist.
By using a lighter face oil as part of your skincare routine, you can effectively hydrate, nourish, and protect your skin for a healthy, radiant complexion. If you’re unsure about which face oil is best for your skin, consider consulting a dermatologist for personalized recommendations.
step 7. moisturizer

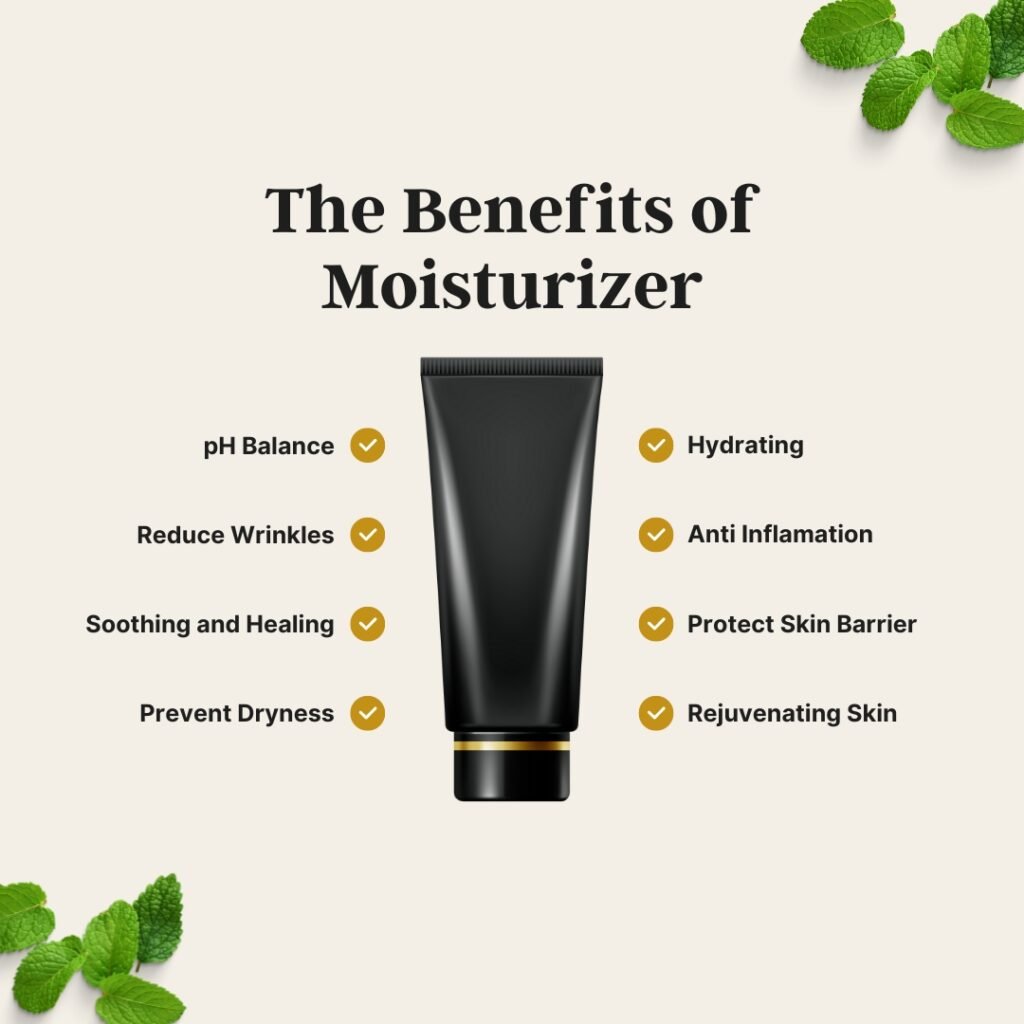
Choosing the right moisturizer for your skin type is crucial for maintaining hydration, preventing dryness, and supporting overall skin health. Here’s how to choose a moisturizer suitable for all skin types:
. Consider Your Skin Type:
Normal Skin: Look for a lightweight moisturizer that provides balanced hydration without feeling heavy or greasy.
Oily Skin: Opt for oil-free or gel-based moisturizers that hydrate the skin without adding excess oil.
Dry Skin:Choose rich, emollient moisturizers or facial oils that deeply hydrate and nourish dry skin.
Combination Skin: Use a moisturizer that addresses the needs of both oily and dry areas of the face, such as a lightweight formula with hydrating ingredients.
Sensitive Skin: Select fragrance-free and hypoallergenic moisturizers formulated for sensitive skin to minimize the risk of irritation or allergic reactions.
2. Look for Key Ingredients:
– Hyaluronic Acid:Provides intense hydration and helps retain moisture in the skin.
– Glycerin: Attracts moisture to the skin and helps maintain hydration levels.
– Ceramides: Support the skin’s natural barrier function and prevent moisture loss.
– Niacinamide: Soothes and hydrates the skin while improving its overall texture and appearance.
– Aloe Vera: Calms and moisturizes the skin, making it ideal for sensitive or irritated skin.
3. Choose the Right Texture:
– Lightweight Gel: Suitable for oily or acne-prone skin, as it hydrates without feeling heavy or greasy.
– Lotion: Provides lightweight hydration and is suitable for normal to combination skin types.
– Cream: Ideal for dry or mature skin, as it offers richer hydration and nourishment.
– Facial Oil: Suitable for all skin types, including oily skin, as it provides concentrated hydration and nourishment.
4. Consider Additional Benefits:
– SPF:Choose a moisturizer with added sunscreen (SPF 30 or higher) for daily sun protection.
– Anti-Aging Ingredients: Look for moisturizers containing antioxidants or retinoids to target signs of aging and improve skin texture.
– Mattifying Properties: If you have oily skin, opt for moisturizers with mattifying properties to control shine throughout the day.
5. Perform Patch Tests:
– Before using a new moisturizer, perform a patch test on a small area of your skin to check for any adverse reactions or sensitivity.
– Apply a small amount of moisturizer to the inner forearm or behind the ear and wait 24 hours to see if any irritation occurs.
Additional Tips:
– Choose non-comedogenic moisturizers to prevent clogged pores and breakouts.
– Experiment with different moisturizers to find the one that works best for your skin type and addresses your specific concerns.
– If you’re unsure about which moisturizer is best for your skin, consult a dermatologist for personalized recommendations.
By considering your skin type, key ingredients, texture preferences, and additional benefits, you can choose a moisturizer that effectively hydrates and nourishes your skin while addressing your specific skincare needs.
step 8. sunscreen

Selecting the right sunscreen for your face is essential for protecting your skin from harmful UV rays and preventing sun damage, regardless of your skin type. Here’s how to choose sunscreen suitable for all skin types:
1. Consider Your Skin Type:
– Normal Skin: Look for lightweight, non-greasy formulas that won’t feel heavy on the skin.
– Oily Skin: Opt for oil-free or mattifying sunscreens to prevent excess shine and clogged pores.
– Dry Skin: Choose moisturizing sunscreens with hydrating ingredients like hyaluronic acid or glycerin to prevent dryness.
– Combination Skin: Use lightweight, non-comedogenic formulas that provide balanced hydration without clogging pores.
– Sensitive Skin: Select fragrance-free and hypoallergenic sunscreens formulated for sensitive skin to minimize the risk of irritation or allergic reactions.
2. Choose Broad-Spectrum Protection:
– Look for sunscreens labeled as “broad-spectrum,” which protect against both UVA and UVB rays.
– Opt for a minimum SPF of 30 for daily use, or higher if you’ll be spending extended time outdoors.
3. Select the Right Formula:
– Lotions: Ideal for normal to dry skin types, as they provide hydration and can be easily spread onto the skin.
– Gels: Suitable for oily or acne-prone skin, as they absorb quickly and won’t leave a greasy residue.
– Sprays: Convenient for reapplication throughout the day, but make sure to apply enough product and rub it into the skin to ensure adequate coverage.
– Creams:Versatile option for all skin types, offering moisturizing benefits and broad-spectrum protection.
4. Look for Non-Comedogenic Formulas:
– Choose sunscreens labeled as “non-comedogenic” to prevent clogged pores and breakouts, especially if you have oily or acne-prone skin.
5. Consider Additional Benefits:
– Antioxidants:Look for sunscreens containing antioxidants like vitamin C or vitamin E, which provide added protection against free radicals and environmental damage.
– Matte Finish: If you have oily skin, opt for sunscreens with a matte finish to control shine throughout the day.
– Water-Resistant: Choose water-resistant sunscreens if you’ll be swimming or sweating, and reapply as directed to maintain protection.
6. Perform Patch Tests:
– Before using a new sunscreen on your face, perform a patch test on a small area of your skin to check for any adverse reactions or sensitivity.
– Apply a small amount of sunscreen to the inner forearm or behind the ear and wait 24 hours to see if any irritation occurs.
Additional Tips:
– Apply sunscreen as the final step in your skincare routine, after moisturizer and before makeup.
– Reapply sunscreen every 2 hours, or more frequently if swimming or sweating.
– If you’re unsure about which sunscreen is best for your skin, consult a dermatologist for personalized recommendations.
By considering your skin type, choosing broad-spectrum protection, selecting the right formula, and considering additional benefits, you can choose a sunscreen that effectively protects your skin from the sun’s harmful rays while addressing your specific skincare needs.